I've been wanting to write this post since I came back from New York seven months ago but several things put me off until now. The primary reason I haven't written about most of the Glossier products I bought yet is that until recently it was unavailable (or should I say difficult to access) for the majority of people who read my blog. Now that the brand has launched in the UK I feel like it's okay for me to write about the products because, although they still don't ship to Ireland, it has become a lot more accessible through third party delivery services such as Parcel Motel and Address Pal.
Another reason is that I wanted to order a few more products to try out so that I could do a full (almost) face of Glossier products. They don't have a mascara yet, so I had to use my Benefit Rollerball. Everything I used was bought in New York with the exception of Haloscope in Quartz, Cloud Paint in Dusk and a repurchase of Boy Brow (which I have already reviewed in full here).
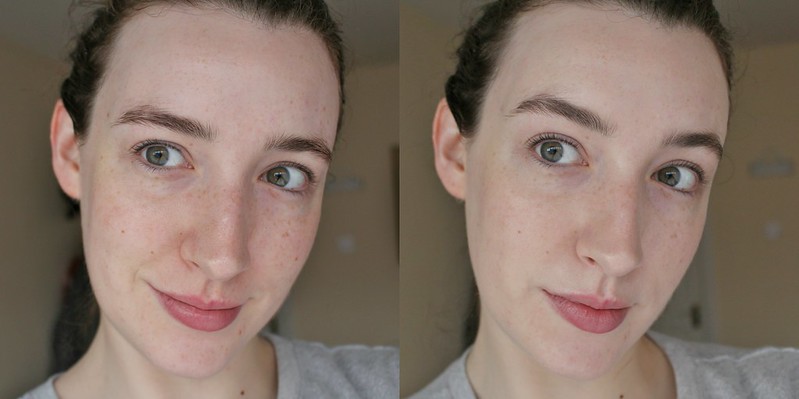
The first product I used is the Perfecting Skin Tint in Light. I wasn't actually going to buy this when I first visited the showroom but I tried it out on my hand and was intrigued by the concept so I decided to get it. Glossier claims that the Skin Tint is an "imperceptible wash of colour...evens out discolouration and leaves your face looking toned, smooth and dewy". The formula is thin and breathable and as easy to use as a moisturiser. They say that it won't "hide your freckles, spackle your pores, or erase any evidence that you are, in fact, human". I must admit that I was sceptical at first, I wasn't sure if I'd like it despite being a big fan of light coverage foundations. But I love that the intention with this product is to give just a tint of colour and even everything out but still allowing the skin's texture to shine through. You can see below my bare skin on the left and two thin layers of skin tint on the right and just how little difference there is. However there is a difference. It still looks like my skin, but just a little more even toned. I happened to be having a good skin day when I took these photos and I have to admit, if I was suffering with breakouts I would probably opt for slightly more coverage. I completely understand that a lot of people are quite self conscious about their skin and I know when I have breakouts, all I want to do is cover them up. But on a daily basis when I'm happy with my skin, this is really all the coverage I want and need.
The formula is very thin and water based so you have to shake the bottle before application. The texture allows for multiple layers and that will give some extra coverage but without feeling in any way heavy. I went for the lightest shade, there is five in total so not a great selection, however I think that because the formula is so sheer, they could adapt to several shades lighter or darker. If you want to buy it but aren't sure of your shade, there is a shade finder option on the Glossier site so that if you upload a photo they will shade match you as best they can. The packaging is plastic and travel friendly and it really is as easy to use as a moisturiser. It's dark every morning when I get ready for work at the moment and when I wear this I don't have to worry about messing it up because it's so fool proof once the shade you're using isn't too far off your skin tone.
I honestly love the Perfecting Skin Tint, however the word "perfecting" is misleading because I think with this light of a coverage you're never going to perfect your skin. But perfection is subjective and although my skin isn't perfect by most peoples standards, I'm really happy with it and it'll never look as good as it does right now so why cover it up with heavy foundations that hide my pores and the texture of my skin. It's not going to be everyone's cup of tea, you'll either love this or hate it, I know a lot of people don't like it but for the very reason I love it. It's £20/$26 so it's not very expensive but it's not cheap either so if you aren't happy with your skin and prefer medium to full coverage, this is definitely not going to be for you.
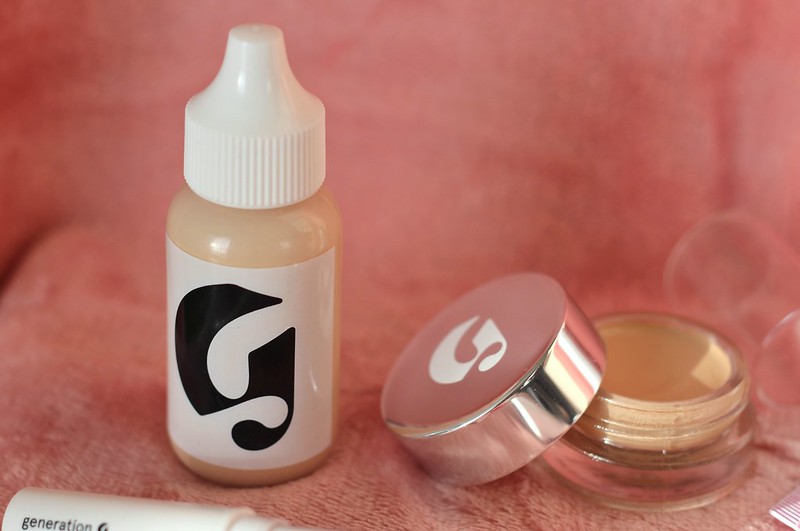
To finish off my complexion, I used the Stretch Concealer under my eyes and anywhere I felt I needed a little more coverage which actually wasn't anywhere on this particular day as my skin was behaving itself. This seems to be another polarising product. Personally, I love it. The texture is unlike any other potted concealer I've used. It's been developed with micro waxes so that it doesn't look dry or cakey. It contains avocado and jojoba oils and cocoa butter to nourish the skin and promote elasticity and give a dewy finish. It also contains adaptable mineral pigments so although it only comes in five shades, they are very easily adaptable to many different skin tones.
I know a lot of people use this in lieu of a foundation because it's so creamy and easy to apply and blend and gives such a beautiful, natural finish to the skin but offers a bit more coverage than the Perfecting Skin Tint. I'm so self conscious about my dark circles and although this doesn't cover them completely, which you'll be able to see in the photos below, I use it in conjunction with a corrector and it works so well under my eyes because of the flexible formula. If you have dry skin, this would be a great option to try out. It's definitely not a heavy duty concealer for covering angry red blemishes but if you don't need too much coverage it works beautifully as a base and as a concealer and again the formula is thin and buildable. If you tend to get oily throughout the day like me, you'll definitely need to set it with powder as it can move around but it gives such a fresh and dewy finish to the skin that I love.
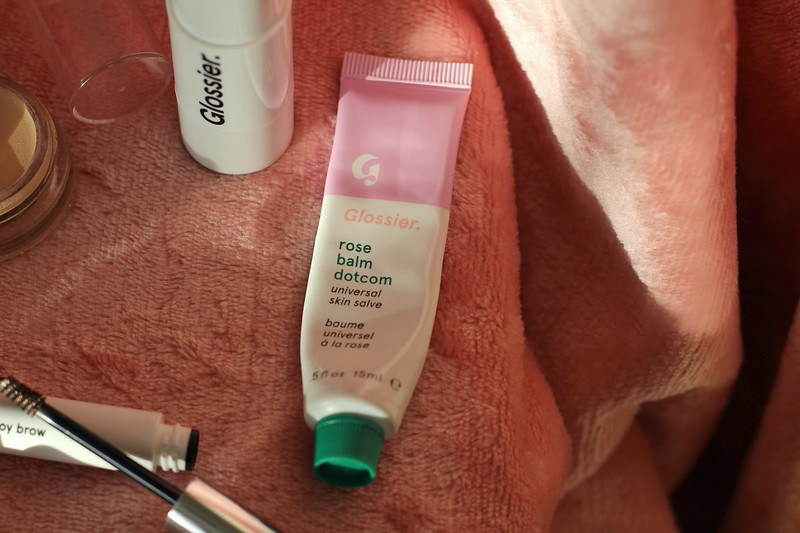
The Balm Dot Com is something again I wasn't too pushed about but I decided to pick one up in New York because who can ever have enough lip balms. I opted for the rose scent which is one of six (I really want the Birthday and Cherry too). Let me begin by telling you the first ingredient listed in this is petrolatum (petroleum jelly), Vaseline anyone? It's an ingredient that seems to get a hard time of it, it's considered a cheap filler ingredient that doesn't do anything except form a barrier on the skin. This can be a good or a bad thing depending on what you're using it for. I don't have a problem with it but if you don't like using Vaseline, you may not like the Balm Dot Com as it does have a similar texture, although it's much more pleasant than Vaseline. It's other ingredients are Castor Seed Oil, Beeswax, Cupuacu Fruit Extract and Rice Bran and Rosemary Leaf Extracts. These ingredients, protect the skin, act as an emollient, give long lasting moisture and are anti-oxidants. As you can see from the tube above, I've used this a lot. I love the texture and the scent and the tube is so handy to bring out in my handbag. I've used it almost every day since I bought it. I like using it before applying lipstick because it locks moisture into my lips. I'd definitely repurchase it, but like I said I want to try some of the other scents even thought I love the light rose scent of this one.
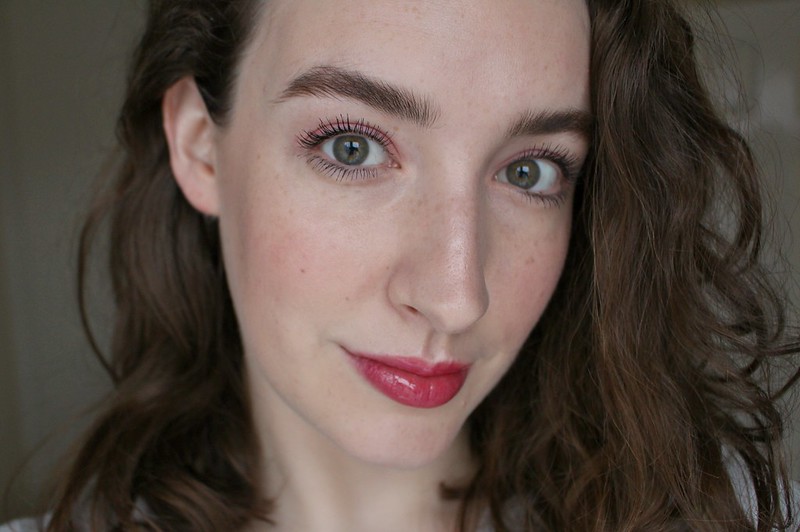
Next up was my brows. You already know how much I love Boy Brow, you can read about it in more detail here if you're interested. I'm so happy to have it back in my life, it really is my favourite brow gel/mascara I've ever tried.
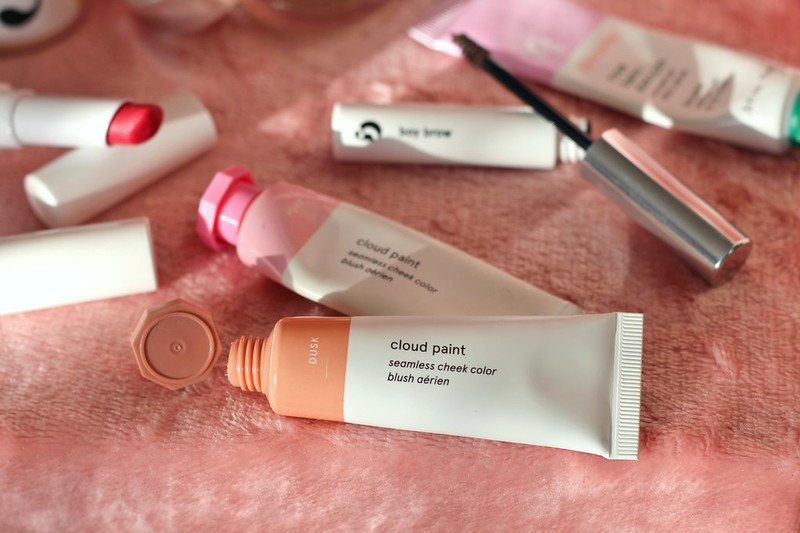
The Cloud Paints are probably my favourite product out of everything I've tried. I have two of the four shades, Puff (a pale bubblegum pink) and Dusk (a warm brown/tan). I bought Puff in New York after agonising over what shade to buy for ages. It's the only blush I've used in the seven months since I got it. So of course I had to order another one. I wasn't sure if Dusk would work on my skin tone but it's actually such a nice neutral once it's blended out. For this look I used it as a kind of contour/bronzer but as you can see it's very light and natural and of course you could build up the intensity of you have a darker skin tone than mine. I used Puff on my cheeks and then I tried it on my eyelids too. I actually really liked the light wash of pale pink on my eyes, I'm sure you could do the same with any of the shades, they could be used on the lips too but I haven't tried it yet. Like with actual tubes of paint, you can mix the shades together too to make your own custom shade. The formula is so light and easy to blend. I usually use my Real Techniques Stippling Brush but you can just as easily use your fingers. They are quite pigmented so a little goes a long way but at the same time it's hard to overdo it.
I love everything about these, the packaging, the shades, the texture and the finish. I'd love to get the other two shades Beam and Haze. There's currently a Cloud Paint Quad available with all four shades for £45/$55 which would make a lovely Christmas present.
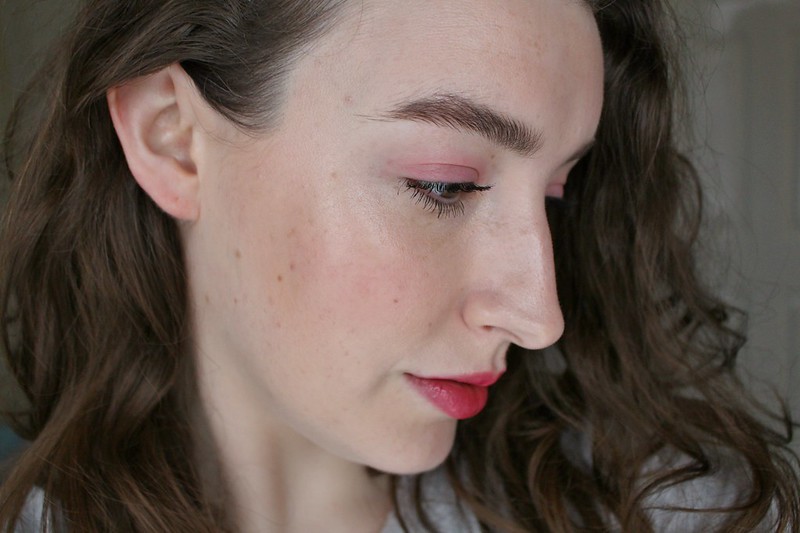
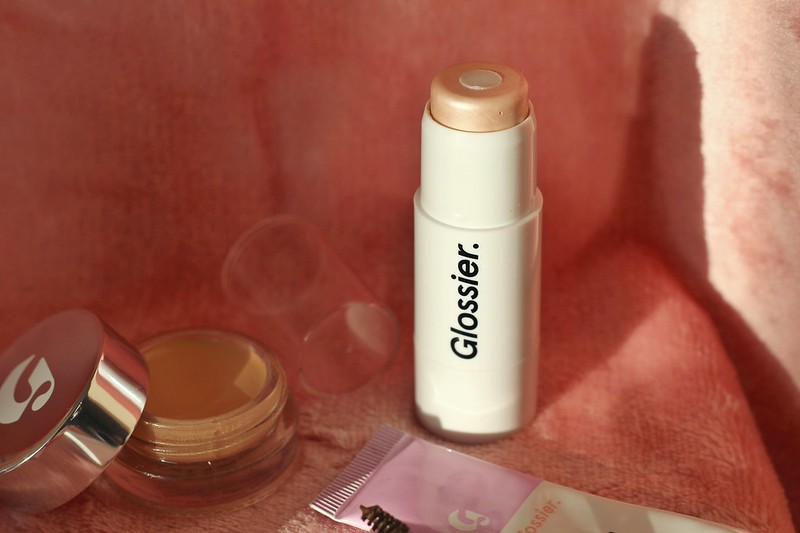
The Haloscope is the one thing I really regretted not buying in New York. I swatched all three shades Moonstone, Quartz and Topaz and I didn't think they were pigmented enough to I left without buying one. However since I got back I've seen them being used several times and they look so beautiful on the skin. With the Haloscopes it's more about texture than pigment. It consists of a solid core enriched with coconut oil, castor seed oil and sweet almond oil to moisturise and vitamin E that hydrates the skin and gives dewy finish. The outer circle contains actual crystals of Rose Quartz or Golden Topaz. I find it works best by rubbing your fingers onto the product and then patting along your skin as this warms it up and makes it easier to blend rather than applying it directly onto the skin which can drag it a bit and move your foundation. I love how this adds such a natural, healthy glow to my skin and again, like most other Glossier products, there's no danger of overdoing it and ending up looking like a disco ball. Having swatched all of them I think Topaz would be too dark for my skin tone but I'd love to get Moonstone.
The Haloscopes are £18/$22 but at the moment there is a Haloscope and Boy Brow duo available for £28/$30
The Haloscopes are £18/$22 but at the moment there is a Haloscope and Boy Brow duo available for £28/$30
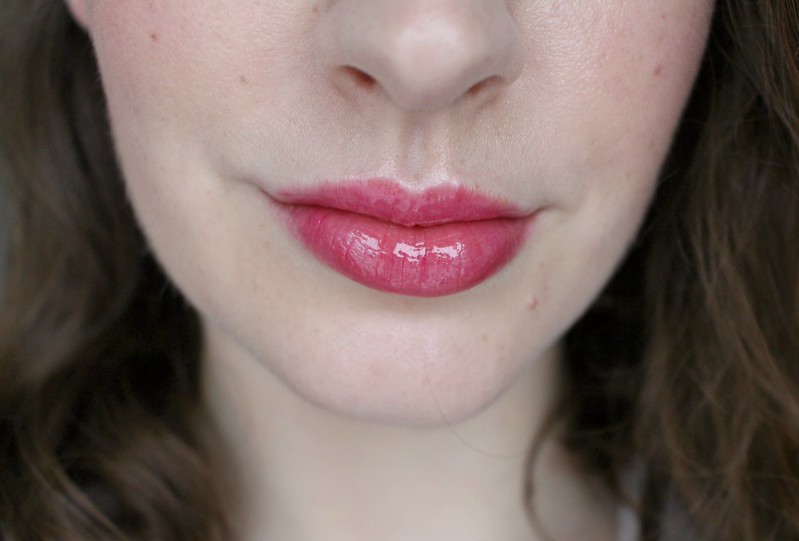
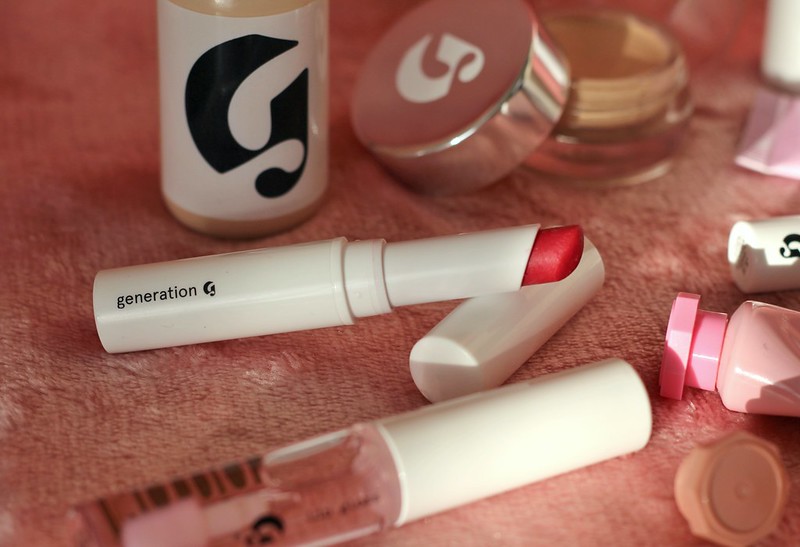
The last two products I used are the Generation G Lipstick in Crush and the Lip Gloss. You might have seen me wearing the lip gloss alone in this post. I was so surprised by how much I liked it. After seeing nothing but matte lips everywhere over the past few years it was nice to get back into glossy lips. A glossy finish is so flattering and makes your lips look much more full. You could use a liner all over your lips first if you want to reshape and add fullness. I didn't want to apply it directly from the tube because it would discolour it so I applied it onto the back of my hand and then used a lip brush to apply it on top of the lipstick. You could do this with any lipstick, including a matte to completely change the look of it. There's something so glamorous about glossy lips, particularly for a night out or a party look. The Generation G lipsticks were not something that appealed to me at all at first, which is unusual because with any new brand I'm always drawn to their lip products first. I ended up getting it as part of one of the sets, as I was already buying two of the products in the set, the lipstick only cost me an extra $2 so I figured I might as well try it.
They are a sheer matte finish and come in six shades. I got the shade Crush which is described as a hot raspberry pink. I was going to get Zip which is the red and probably the most pigmented of all the lipsticks. I wouldn't really be bothered with the three lighter shades because my lips are quite pigmented I don't think they'd show up much on my lips but the three darker shades Crush, Zip and Jam are perfect for anyone who wants fuss free lip products. I definitely still want to get Zip as I think it would be a great everyday low maintenance red that I could wear in work without having to worry about it. I like the sheer matte formula however the only problem is that it's very unforgiving so if your lips are dry at all it will stick to the dry patches and emphasise them. Once your lips are exfoliated and hydrated there is no problem at all applying them. The one negative thing about the one I got and I don't know if all of them are like this but I found the actual bullet to be quite flimsy and mine actually broke so now I can only twist it up slightly to apply it because otherwise it falls out of the tube so that's something to keep in mind when you're applying it. I find the combination of a sheer colour with gloss a lot more wearable for daytime than a full on pigmented gloss so I love the combination of these two but I can't wait to buy Zip and wear that with the gloss.
The two are currently available in a duo set for $26/£20. You can buy the lipstick alone for $18/£14 and the lip gloss for $14/£11.
The two are currently available in a duo set for $26/£20. You can buy the lipstick alone for $18/£14 and the lip gloss for $14/£11.
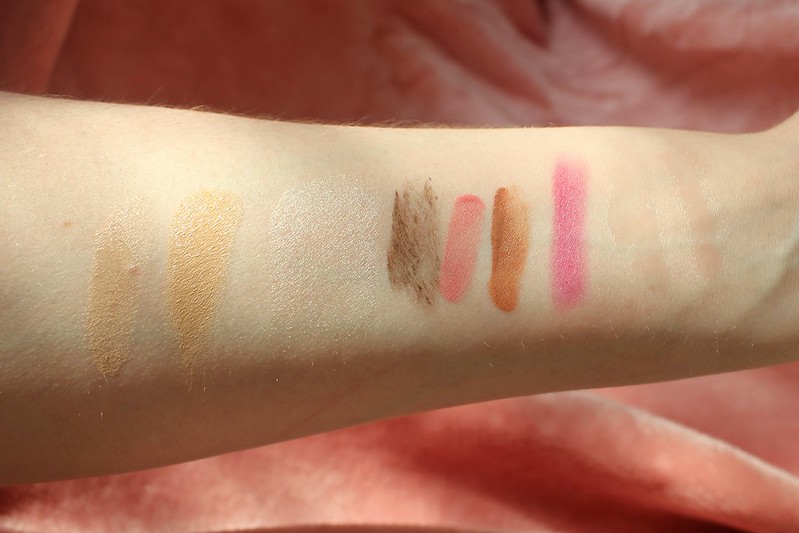
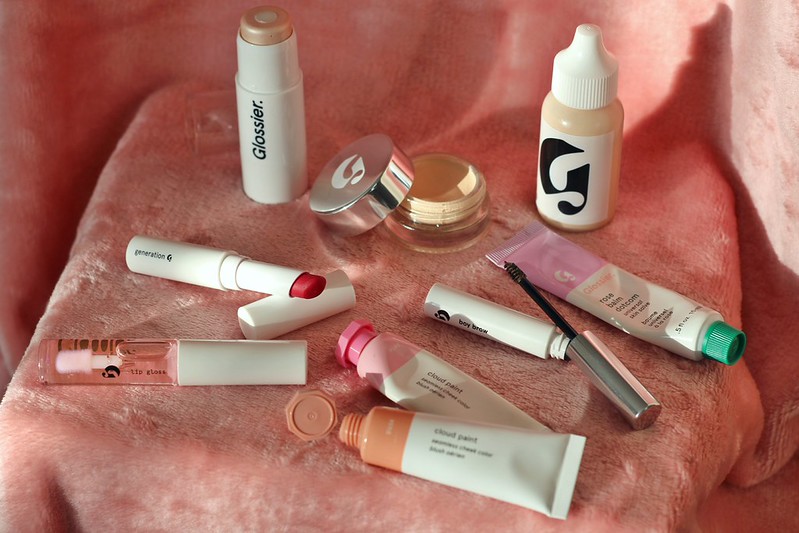
L-R Perfecting Skin Tint in Light, Stretch Concealer in Light, Haloscope in Quartz, Boy Brow in Brown, Cloud Paint in Puff, Cloud Paint in Dusk, Generation G lipstick in Crush, Lip Gloss, Rose Balm Dot Com
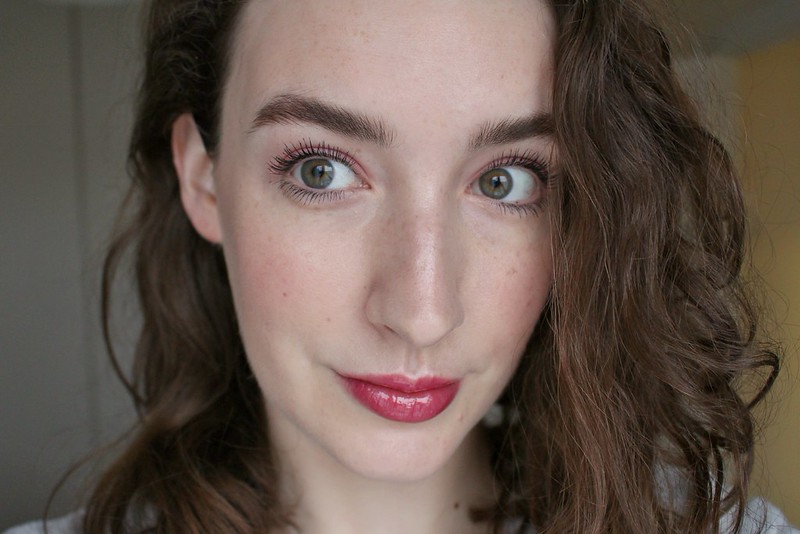
I think this post is a bit more valuable now that the hype has died down somewhat. I didn't want to get caught up in being one of the hundreds of bloggers writing about Glossier just as it launched in the UK despite having most of these products since April. Now that I've owned and used them for a long time I'm definitely still a firm fan of the brand. The way they have marketed themselves and grown as a brand over the last few years is something that has impressed me and I'm happy to support because I feel like it's such a refreshing brand in the beauty world. I don't like all of their products that I've tried, but there isn't any brand in the world that have a range of products that everyone will try and like. I didn't find the Super Glow did much for my skin at all and I thought for 15ml of product it was overpriced. I do however think the other products I've tried are reasonably priced and I was happy to see that the UK conversion was very close to their USD equivalent.
I still want to try the Wowder, the body products, the sunscreen, the priming moisturiser and the masks. I'm also dying to buy their new fragrance Glossier You. I got a sample of it with my last order and I absolutely love it.
I'm very interested to see where they go in the future and what products they decide to release next as they have no mascara or eyeshadows in the range yet.
Have you tried Glossier yet? Would you like to or is the brand just not for you?
Emma x